


How to Create a Filtered Data in Document Template using Power Automate
Step 1:
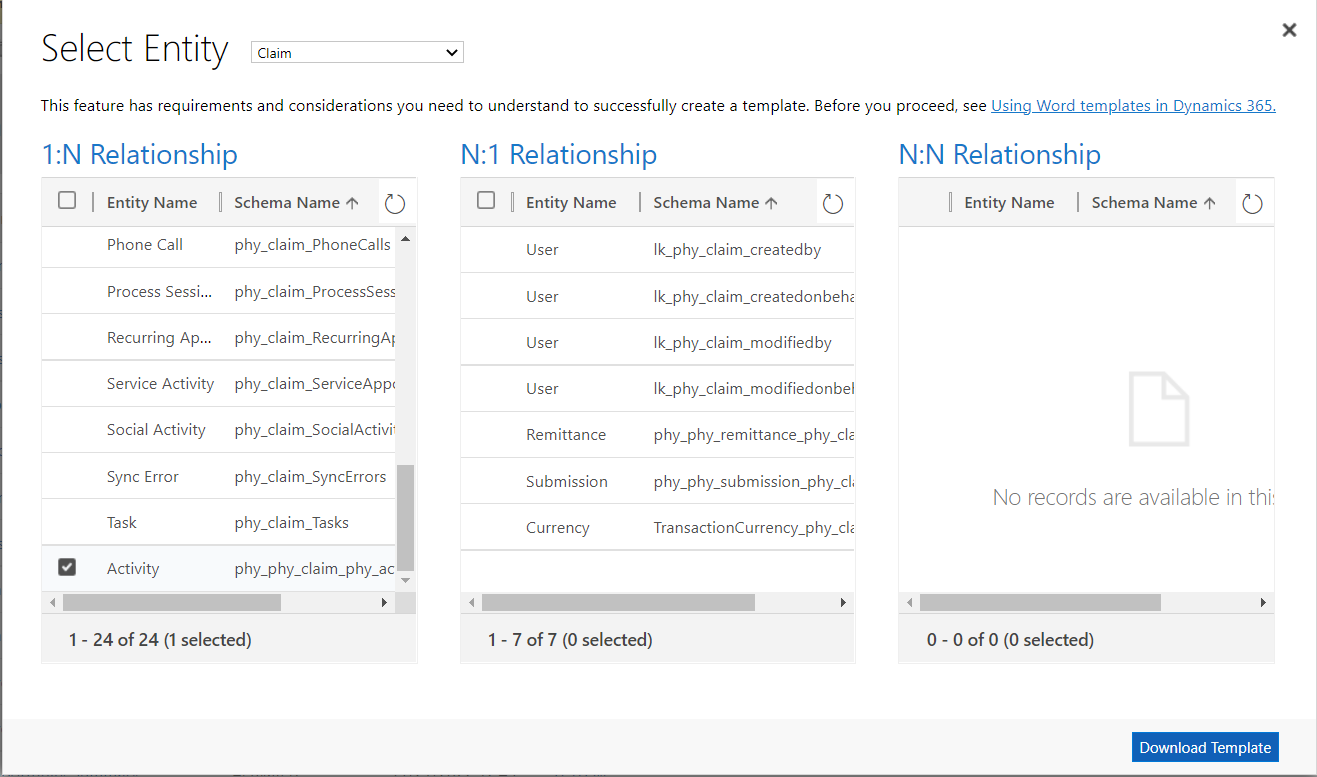
Create a Word Document Template in Dynamics Selecting an Entity. You can then choose which entity data we need (1:N or N:1 or N:N). Then click Download Template.

Step 1.1:
Open the downloaded template and enable developer option in word Doc and Select the XML Mapping Pane by selecting the XML we get the list of fields then we can start mapping the field.
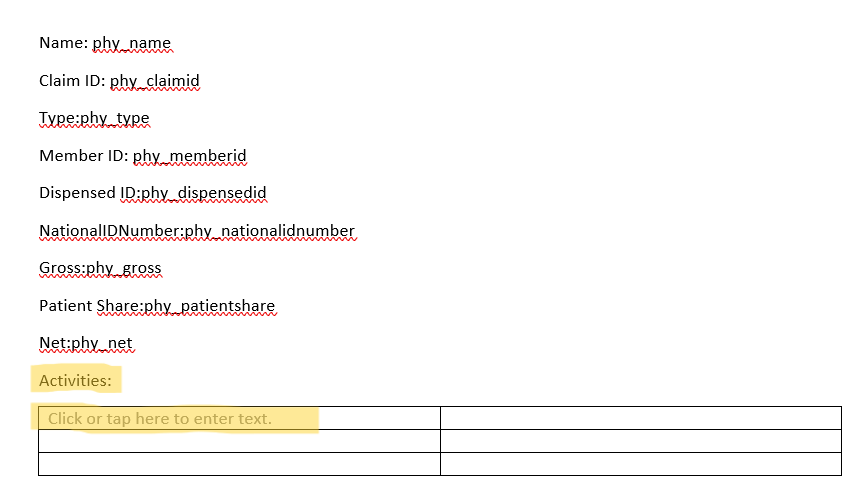
In the Above Image the Highlighted part is added as Repeating Section Content Control this will display the list of records (save the file and upload it to one drive from there we extract it and update with filter conditions)
Note: if we want only Filtered records or Data follow the below steps
Step 2:
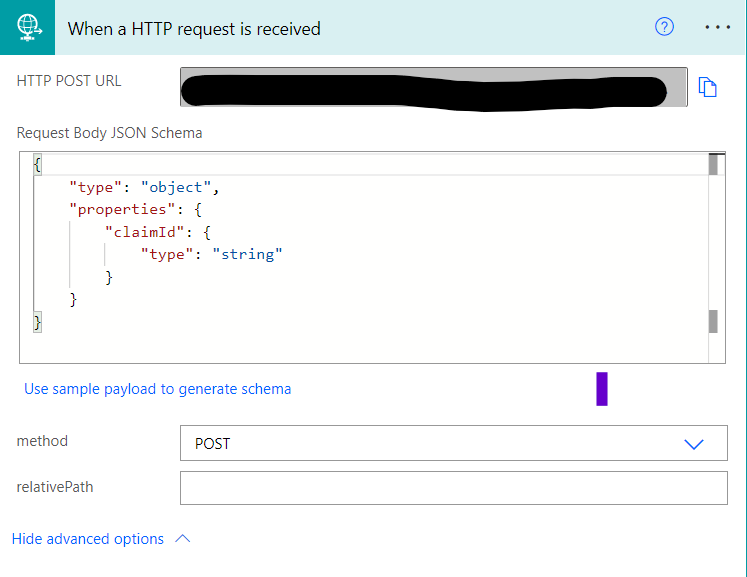
While Creating a Power Automate Flow, select the Trigger as When an HTTP request is received and pass the parameter in JSON format as shown below Example: we’ll pass “claimId”.
Select the Method as POST
To trigger this flow we have to create a Ribbon Button or Postman to verify (or as per our requirement).
Here I’m choosing ribbon button to trigger the Power automate Flow
Step 3:
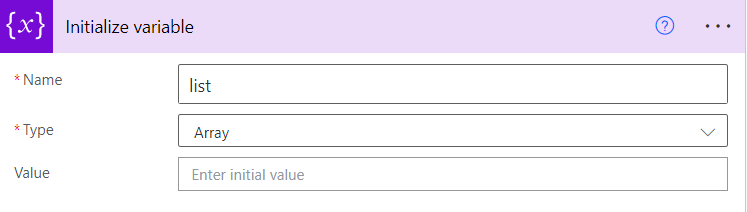
Select the Initialize Variable and add the Name as list and type should be an array or string as per the data requirement.
Step 4:
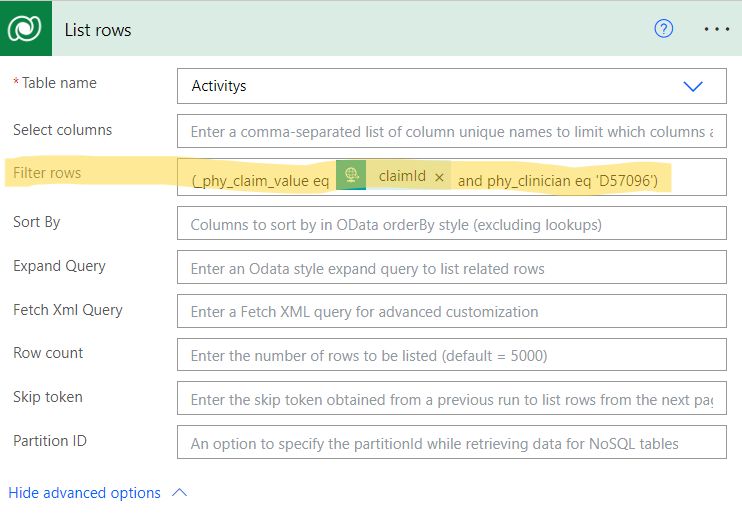
Select the List rows and select the table name (entity).
Now we can filter the record or data by using the “Filter rows” by adding the conditions
(_phy_claim_value eq @{triggerBody()?['claimId']} and phy_clinician eq 'D57096')
Step 5:
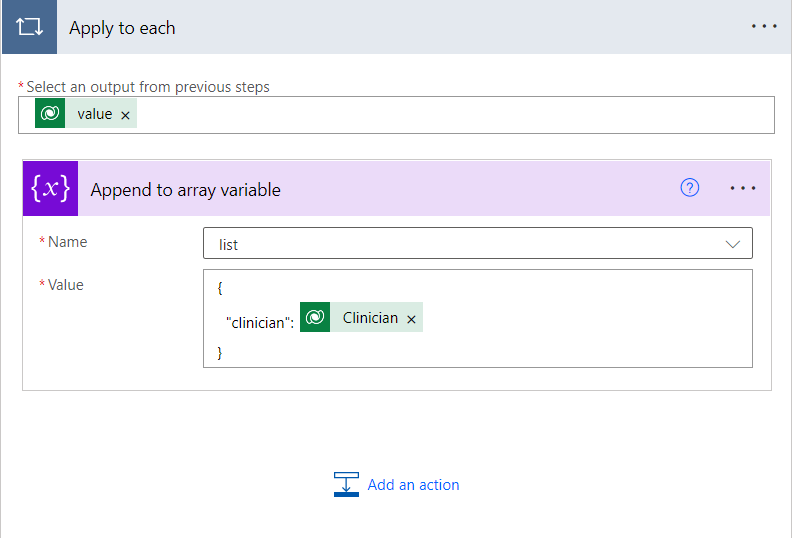
Select Apply to each and add Value and select Append to array variable means we are adding value to a variable (variables are like containers for storing values). Here we have the value in clinician adding it to list array variable.
Step 6:
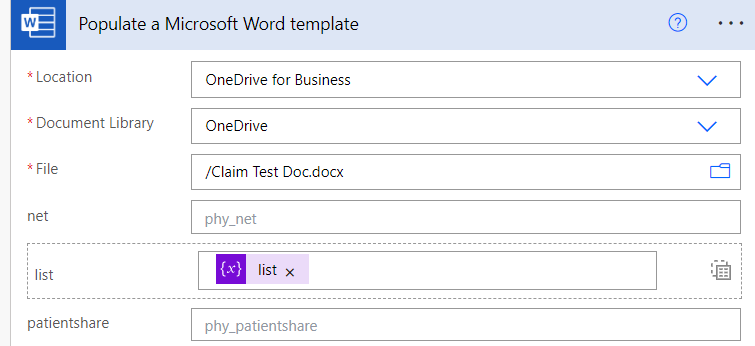
Here we need to Select Populate a Microsoft Word Template and add Location of the file and its library and the select the file name
NOTE: Here we can see the “list” field which we have added in the document and now we must add list array variable which contains the filtered Data or Values.
Step 7:
Now the Document Template is ready with filtered condition.
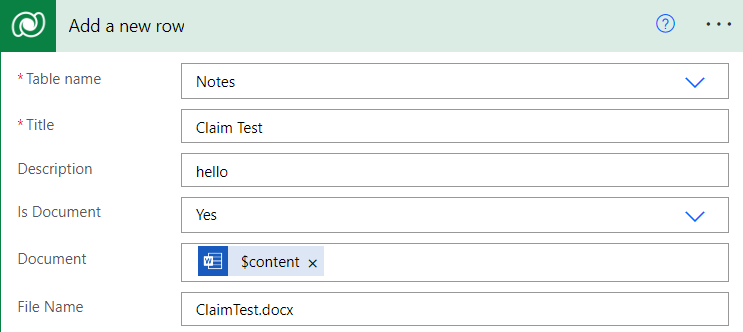
We can add the document to Email/CRM/Notes here I choose Notes.
Now I’m Adding the document to the notes entity give the title name and Is Document is yes(true)
Add the document body('Populate_a_Microsoft_Word_template')?['$content'] this expression will help to populate the document in notes timeline.
Regarding (claims) /phy_claims/@{triggerBody()?['claimId']}

Step 8:
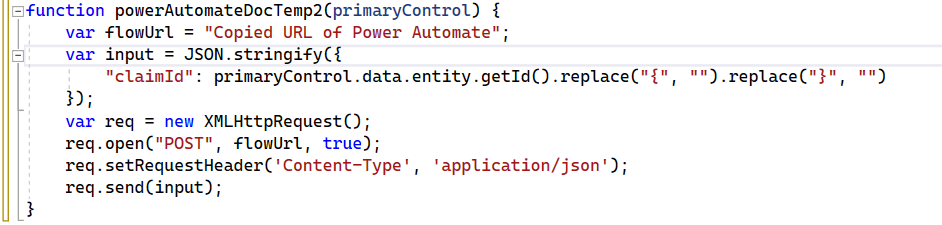
To trigger the Power Automate flow I’ve added Ribbon Button, to trigger this flow we need to use the below JavaScript code.
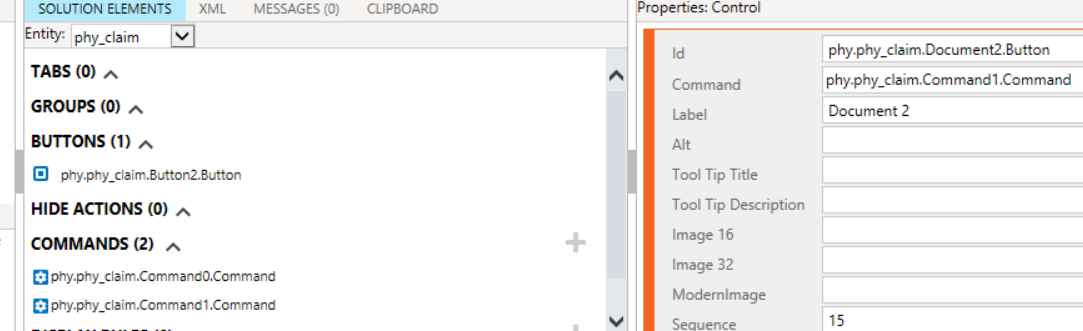
Add the HTTP POST URL in the Variable flow URL and pass the “claimId” in the input and create and Ribbon Button and add the below JavaScript code as command.
Step 8.1:
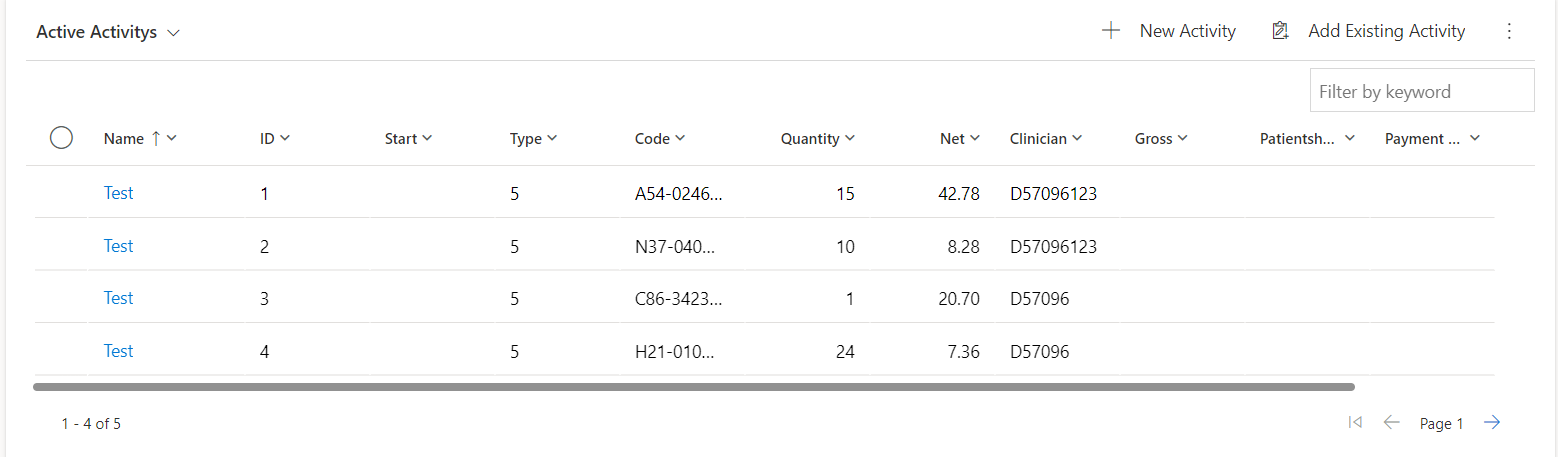
Now we will test the flow
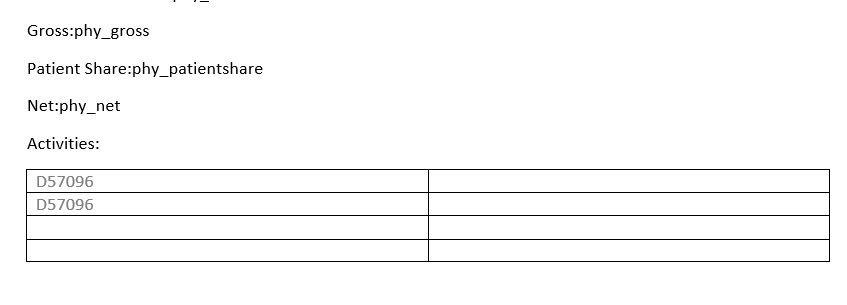
Below I’ve 4 records two are D57096123 and other two are D57096 I only need D57096
I’ve Already added the condition in Step 4
(_phy_claim_value eq @{triggerBody()?['claimId']} and phy_clinician eq 'D57096')
Step 9:
Now click the Ribbon Button here I named as Doc Buttons after clicking the button the document will be populating in Notes timeline
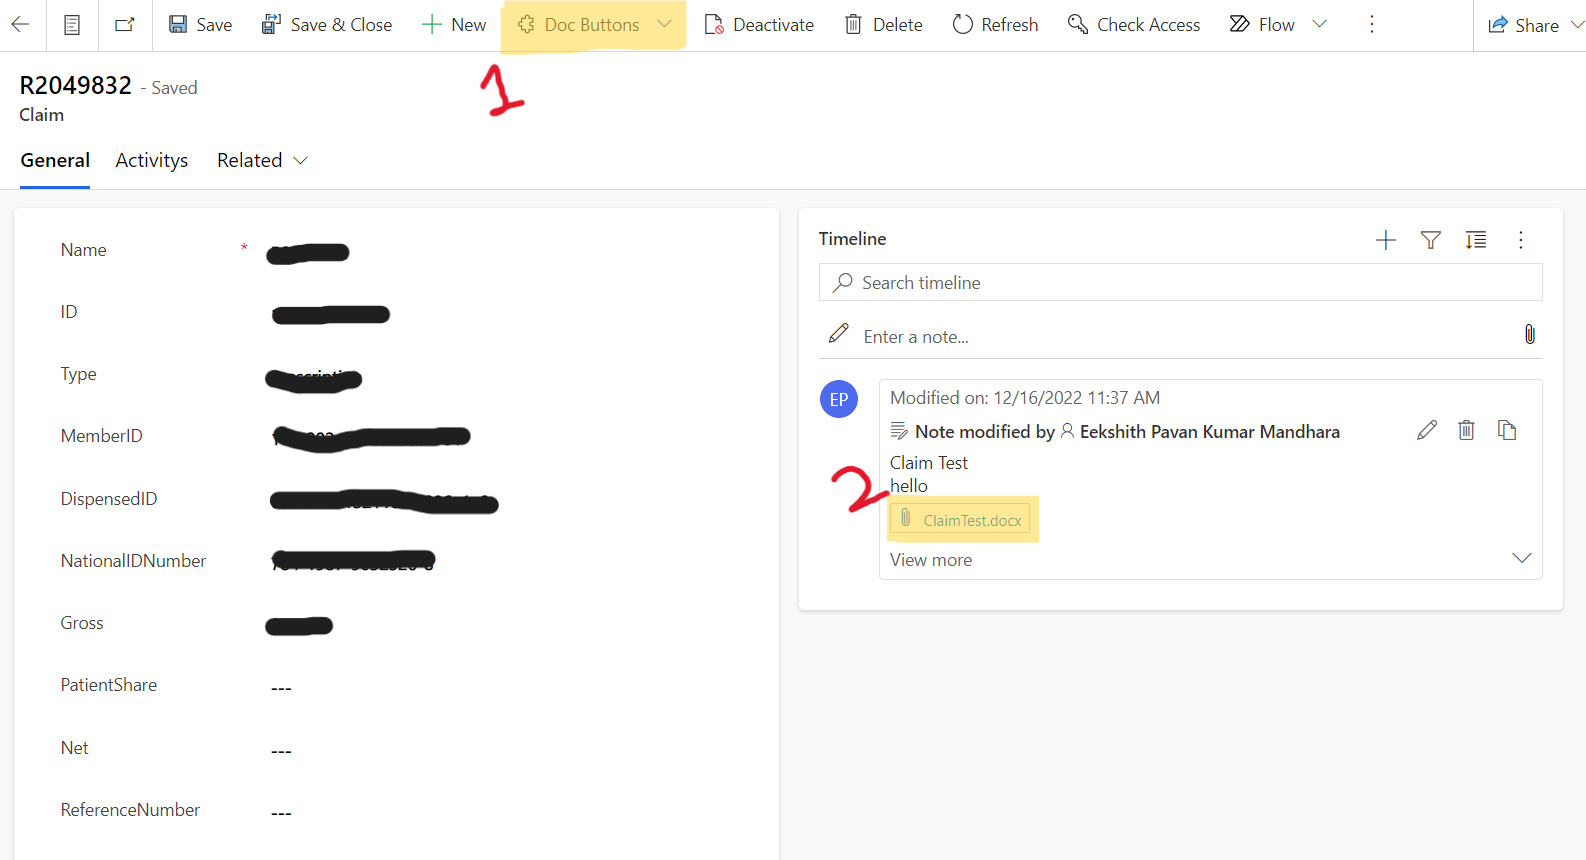
After opening the Claim test Document, we can see 2 record which I want.
We can write the Filter Condition using Power Automate with low Code no Code we can still modify as per our Requirements using Power Automate.

How to Create a Filtered Data in Document Template using Power Automate


