


Move attachments from D365 to SharePoint & provide convenient link on Email and Delete Attachments in CRM by using Power Automate
Step 1:
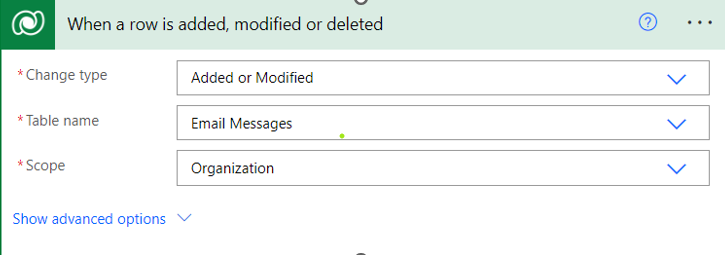
Create a blank Flow template. Choose the Dynamics 365 Connector and trigger as, “When a row is added, modified or deleted”.
Select your Organization Name, and the entity, in our case it is Email Messages.
Step 2:
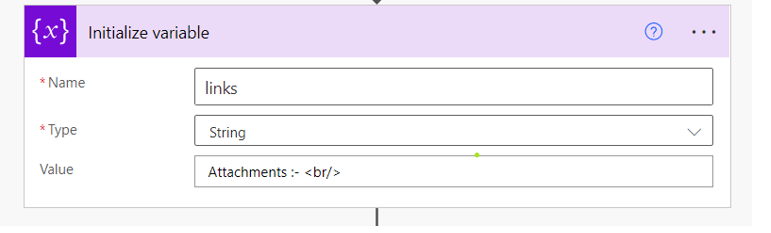
Adding Initialize variable for links
Select Name as Links and its type is string
Without adding the value, we didn’t get the proper way for Links in CRM Email Body. Because we are adding value for CRM Email Body. By adding <br /> break tag we will get step by step links in Email Body
Step 3::
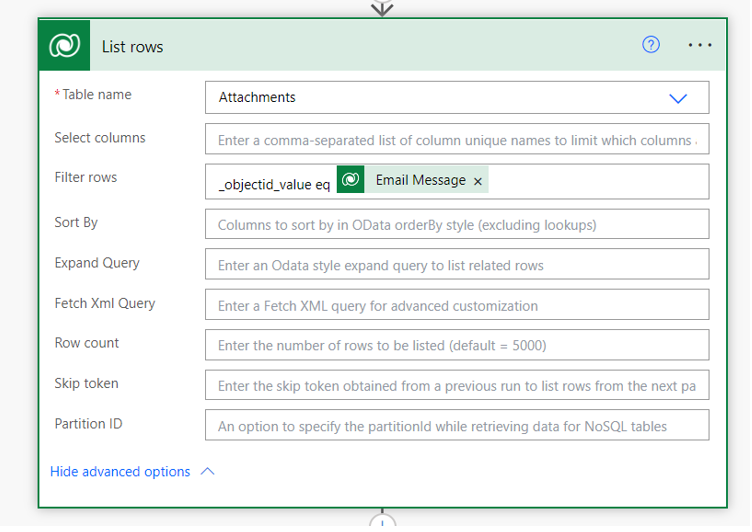
First chose the Microsoft Data verse then add the List Rows
We can select Attachments for Table Name after that we can filter the row and select Email Message
before that we add _objectid_value eq. This is for is email message is equal for object id value.
Step 4:
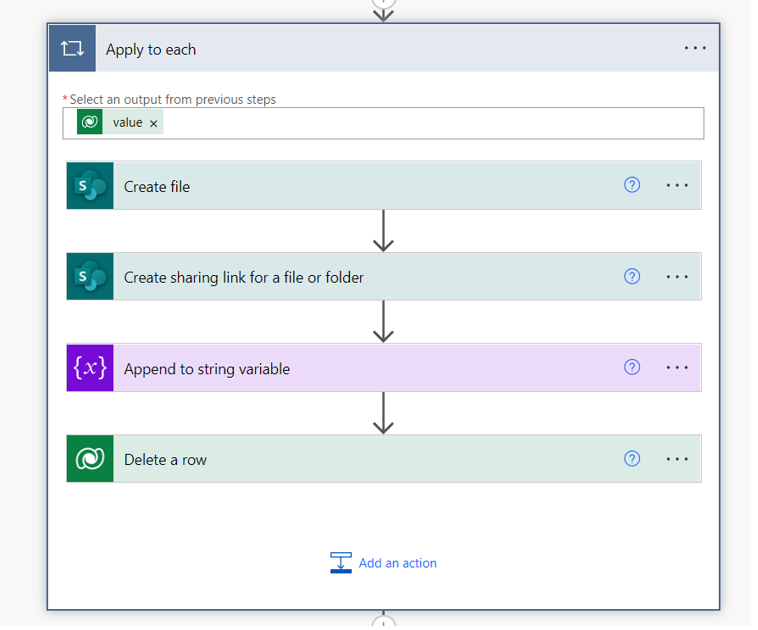
In this step 4 we can have 4 steps
1) Create File
2) Create Sharing Link for a File or Folder
3) Append to string Variable
4) Delete a Row
These 4 steps are involved in the Apply to Each step
In this step we can select the Apply to each and select Value for Output from previous steps
Step 4.1:
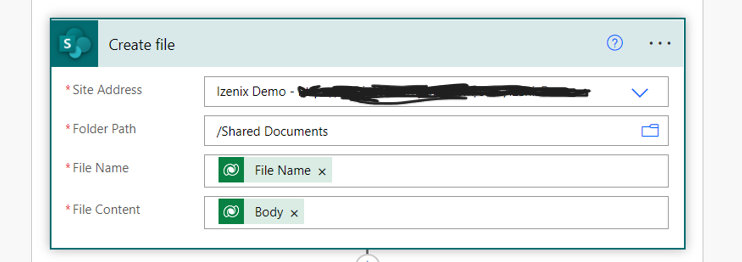
In this we can Select Create File from SharePoint
We can add our Site Address, Folder path is Shared Documents, chose the file name and file Content
Step 4.2:
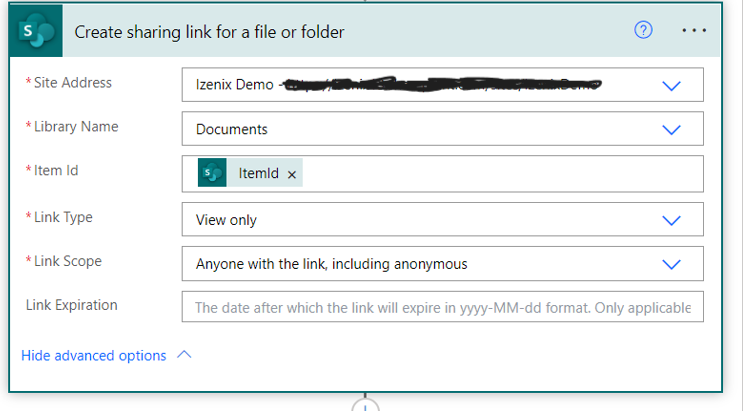
We can add Create Sharing link for a file or Folder from SharePoint
In this we can add Site Address, Library Name is Documents, Item Id is Itemid only we can select from SharePoint only, In Link Type we can select view only or View and Edit and Link Scope
Step 4.3:
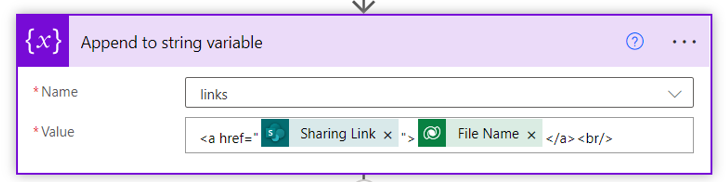
We can Add Append to String Variable
In this select Name as Links and the value for sharing links and showing file name or showing links also
<a href=”Sharing Link”>"File Name"</a><br/> (this show the File Name)
<a href=”Sharing Link”>"Sharing Link"</a><br/> (this will show the file link )
Step 4.4:
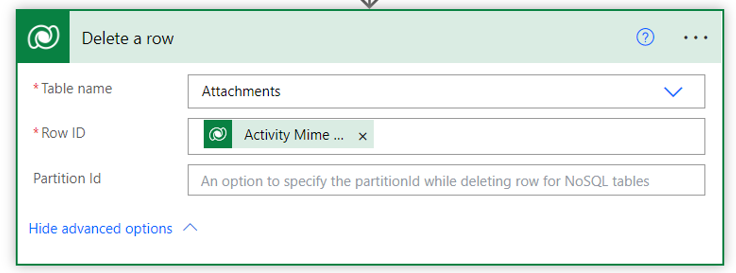
And the last one we can Delete the Email Attachment in CRM
We can Add the Delete a Row in Microsoft Dataverse
In this select Table name as Attachments and we can select Row ID is Activity Mime Attachments in List Rows
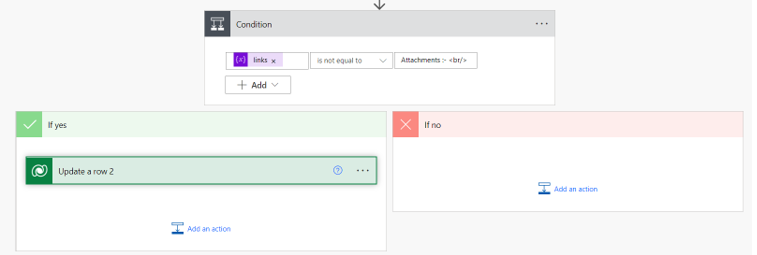
Step 5:
We can Add a condition If the Links are not Equal to the Attachments <br /> then update the
Email Message
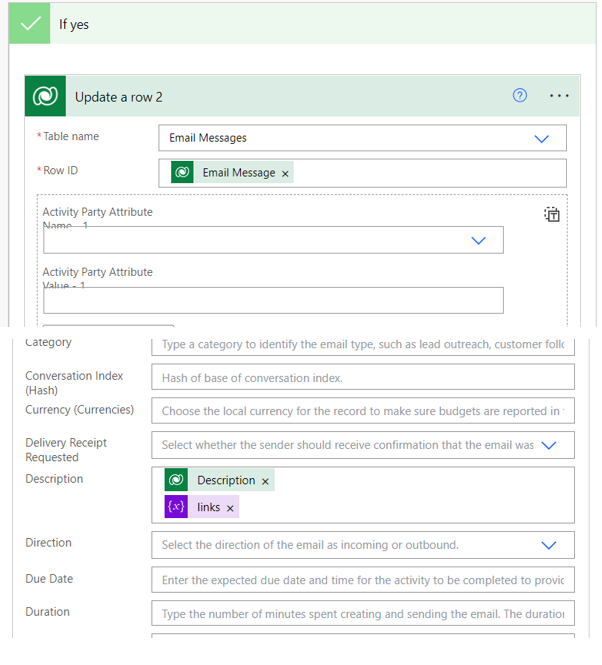
Links is != to Attachments then select If Yes and Update a Row
In the first we select Microsoft Data verse and select Update a Row
The Table name is Email Message, Row ID is same as Table name Bcz we are Updating this Table and Row ID after that we will go to Advance Option, we will get more options. In this Description we can Add Description and Links

Move attachments from D365 to SharePoint & provide convenient link on Email and Delete Attachments in CRM by using Power Automate


